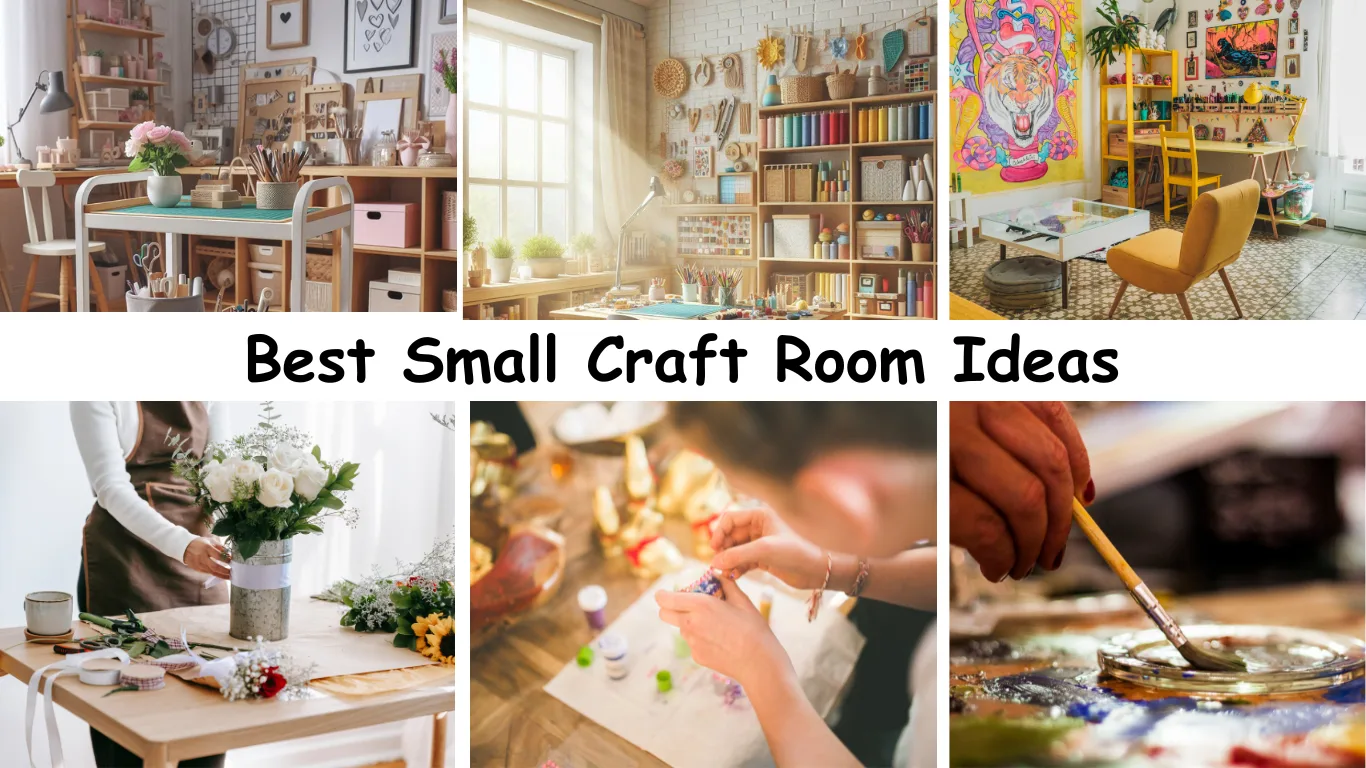
Are you passionate about crafting but have a lack of space in your room? Creating a dedicated space for crafting can be a challenging task especially if you have small rooms at home. But with a few tricks, right ideas and organization strategies, you can transform a small space into a creative and inspiring workspace.
In this post, we’ll share 8 best small DIY craft room setup ideas that will help you maximize your space, helps you create a practical and beautiful workspace. Whether you love weaving, pottery, sewing, toy making or any other DIY crafting projects, the ideas mentioned will help you create a joyful working space. This post will give you smart storage ideas to store a lot of supplies, small craft room organization ideas to create a separate zone for each task and ideas for creating a clutter-free space.
Let’s dive in.
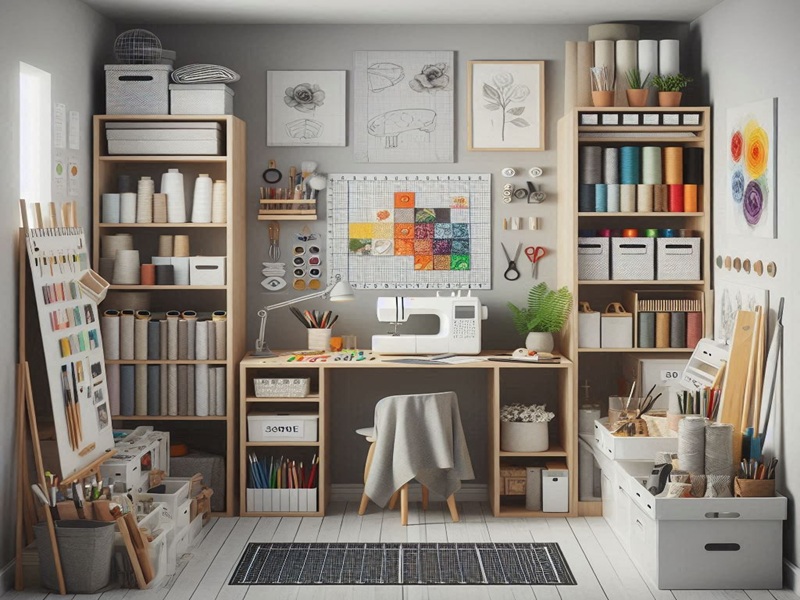
1. Utilize Vertical Space
Vertical space is the best option to create a craft room since floor space is limited in small rooms. Vertical space refers to the available space from the floor to the ceiling. It gives an organized look to your room where every material is stored in an easy-to-reach manner.
Use vertical storage (like Tall shelving units or floating shelves) for your frequently-used materials such as fabric, paint, or yarn, so you can access the desired item easily during your crafting sessions. Here are some other ideas that provides you way of utilizing the vertical space:
- Install wall-mounted shelves for paper rolls, markers, or small containers.
- Use pegboards to store hanging tools like scissors, glue guns, and measuring tapes.
- Attach small baskets on pegboards to store beads, buttons, and sewing accessories.
- Install wall-mounted racks to keep rolls of paper, fabric, or ribbons.
- Add a magazine rack to store craft magazines, colored papers, or sketchbooks.
- Hang a wire basket system over the door to keep bulkier items like rolls of wrapping paper or canvases.
- Attach a cork board or whiteboard over the door to pin important notes, to-do lists, or design inspiration.
- Install a ceiling-mounted rack to hang lightweight baskets or bins.
2. Use Multi-Purpose Furniture
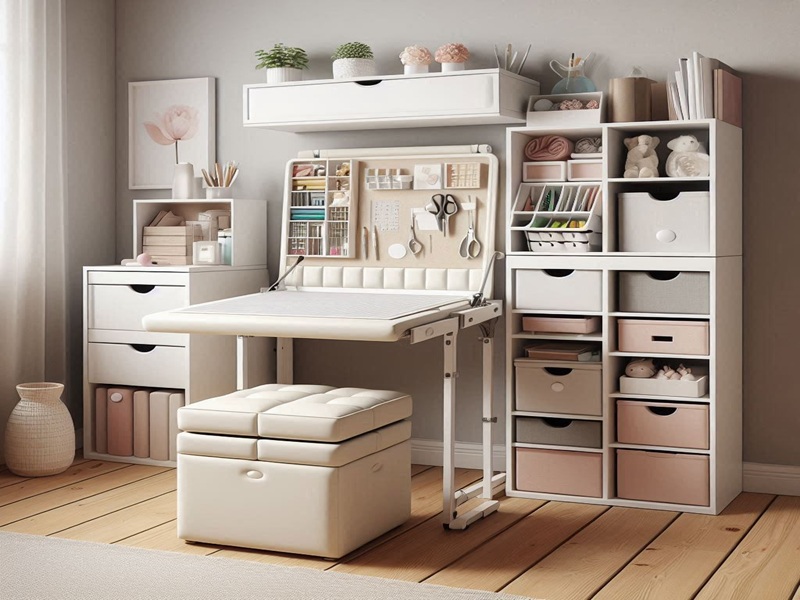
Using different types of furniture consumes a lot of space which makes your crafting room unmanaged and there will not be enough space to keep the crafting related accessories. So, investing in multi-purpose furniture is a great idea to maximize the space and keep your supplies organized.
Always prefer easily movable furniture with multi-functioning furniture since it helps you to transform your crafting space depending on the project you’re working on. Here are the some key points that provides you ideas for investing on furniture:
- Choose a table that is easily foldable so that you can put away the table when not in use. A foldable table with built-in storage compartments will be best for storing tools and materials.
- Choose a padded stool, Ottoman or Bench with a hidden compartment. Such furniture can be used for seating as well as a storage unit.
- Choose a modular cube storage shelves with a built-in pull-out or fold-out desk. A modular cube storage is easily customizable based on your needs and also provides both storage and workspace in one unit.
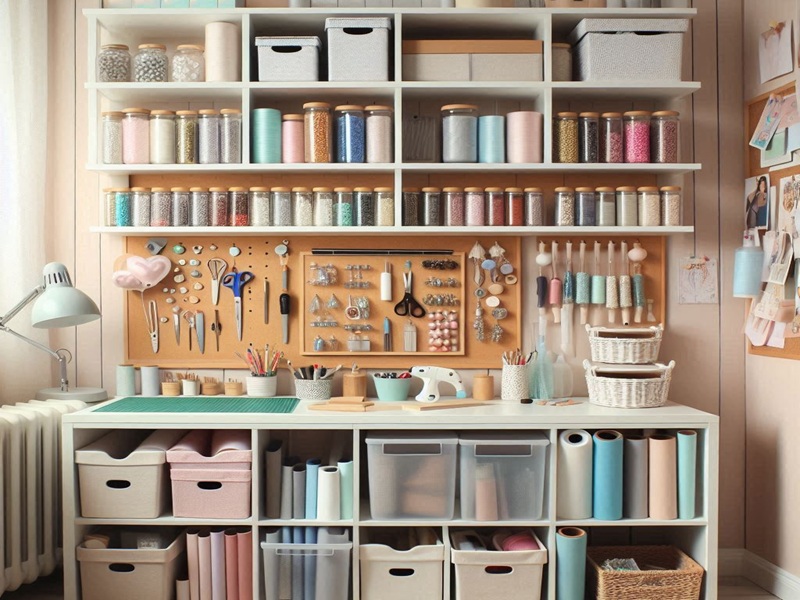
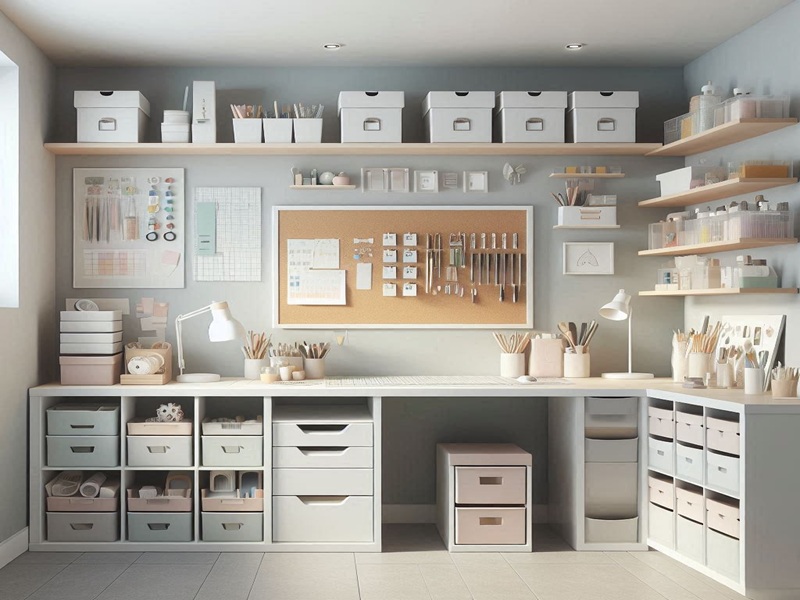
3. Use Open Shelving with Clear Containers
Searching and finding the right item that you need quickly is a challenging task if you have a small craft room. An open shelving with clear containers is a great choice which helps you store equipment in an easy-to-reach manner so that you can quickly identify what you need without wasting time.
Install the Open shelving on walls to store jars, bins, or baskets filled with small craft materials like buttons, beads, and ribbons. You can use floating shelves to display colorful crafting accessories like yarn, ribbons, or markers to get a fun and creative vibe.
Here are some practical ways to use open shelves effectively:
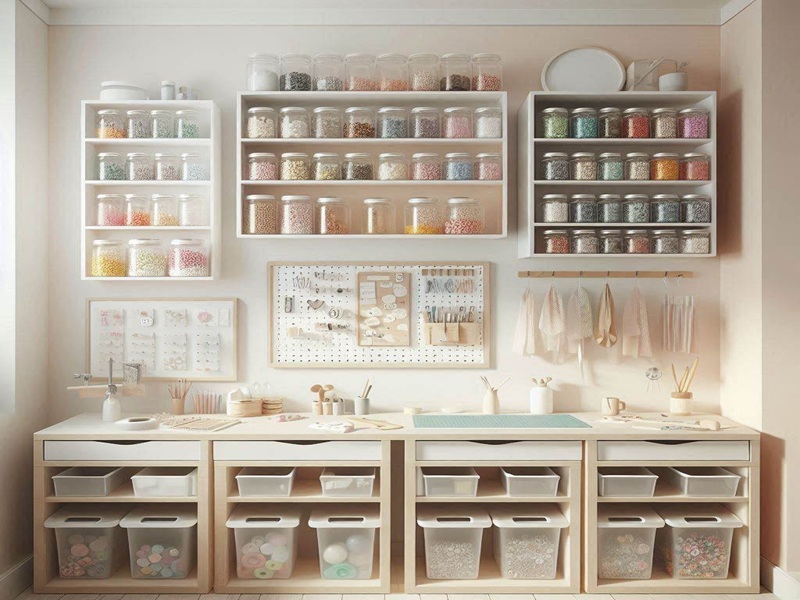
- Use clear jars or labeled containers to organize the crafting materials in an easy to find manner.
- Install cube storage shelves to store fabric, paint supplies, and paper stacks in separate sections. For a clean look, you can add fabric bins or woven baskets inside cubes.
- Install two or three floating shelves above a crafting desk to store essentials like sketchbooks, glue, scissors, and markers.
4. Create Different Craft Zones for Different Tasks
Creating separate craft zones for each task is one of the best ideas especially for those who have a small craft room. The major benefit of creating separate craft zones is you will have a designated area for cutting, one for sewing, and another for storing materials. As a result, it will help you focus your mind on one task at a time. This will also help in keeping your small space clutter-free, organized and efficient.
Create zones by placing furniture and tools in specific areas dedicated to particular crafts (e.g., a sewing zone with a sewing machine, a paper crafting zone with a cutting mat). Use room dividers or open shelving to visually partition each zone if necessary.
Here are some tips and tricks that help you creates different craft zones in a small craft room:
I. Workstation Zone:
Workstation zone is a central workspace for hands-on crafting like sewing, painting, scrapbooking, or DIY projects. Here are the workstation zone setup steps:
- Use a desk or table as the main work surface
- Keep essential crafting tools like scissors, glue, rulers or markers in desktop storage organizers
- Place a foldable chair which provides good back support
II. Storage Zone:
Storage zone helps to store all crafting materials efficiently and prevent any visual clutter. Here are the storage zone setup steps:
- Install open shelving or cube storage for easy access
- Organize paint bottles on floating shelves
- Use clear bins to store fabric rolls, labeled jars to store beads and buttons
- Arrange frequently used items on wall-mounted racks or pegboards
III. Cutting & Measuring Zone:
Create a cutting & measuring zone for cutting fabrics, measuring and assembling tasks. Here are the cutting & measuring zone setup steps:
- Use a foldable table or a portion of ordinary desk for cutting the materials
- Store rulers, measuring tapes, rotary cutters, and scissors in a drawer
IV. Inspiration & Planning Zone:
Create an inspiration and planning zone to brainstorm ideas and plan creative ideas. Here are the inspiration and planning zone setup steps:
- Hang a corkboard, whiteboard, or pegboard for project ideas
- Keep a sketchbook nearby your inspiration & planning zone for planning the creative designs
- Use a pinboard for fabric swatches and color palettes
5. Brighten up the Room with Natural Light
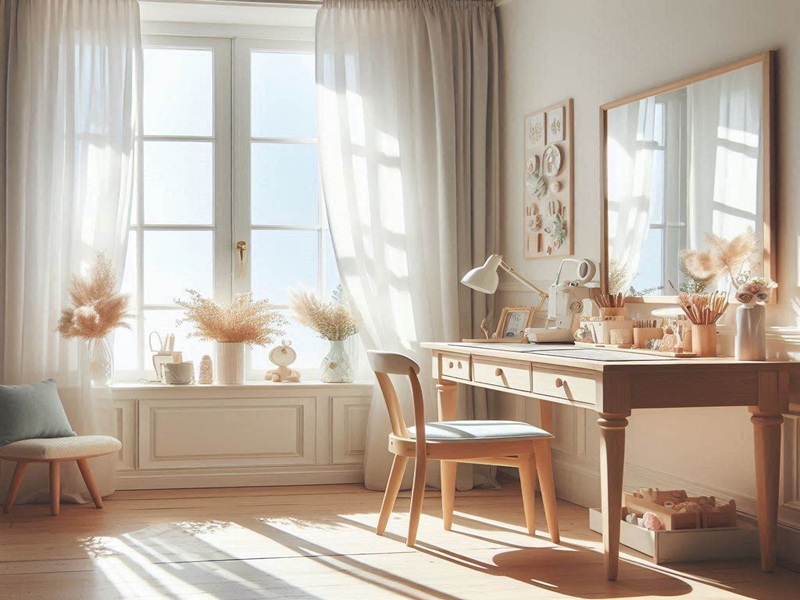
A craft room with natural light provides a clear visibility, reduces eye strain and creates an airy, inviting atmosphere that boosts your creativity. Natural light is more essential for painting, knitting, sewing, and detailed crafts. It also prevents headaches and fatigue during long crafting sessions since you don’t need to rely on artificial light.
Here are the some ideas that helps you optimize natural light in a small craft room:
- Position your crafting station near a window for better visibility and shadow-free lighting.
- Paint the wall with neutral colors like white, beige, or soft pastel tones to reflect the light all over the room.
- Use light-colored furniture to reflect light and brighten up the space.
- Consider installing sheer white curtains to allow more light to flow in.
- Place a small decorative mirror opposite the window to reflect sunlight across the room.
Read Also: 10 Best Minimalist Small Bathroom Design Ideas
6. Keep the Craft Room Clutter-Free
No matter how small your crafting room is and how many storage hacks you use, if you succeed in creating a clutter-free environment, it will help you focus on your crafts without distractions. Keeping the most essential items and decluttering regularly is one of the major principles in creating a clutter-free room space. It also avoids overwhelming the craft room with unnecessary tools or supplies.
Here are the some ideas for keeping clutter-free craft room which make your craft room neat and functional:
- Keep only the frequently used machinery and tools.
- Label drawers and shelves with categories like “Paper Supplies,” “Paints,” “Adhesives”.
- Label the plastic containers, jar or bins. Store beads, buttons, or sewing supplies in such labeled containers.
- Implement “One-In, One-Out” Rule. Example: If you purchase new yarn, donate or recycle leftover scraps.
- Keep only the materials you actively use to get rid of duplicate materials.
- Create a weekly checklist to remove the excess materials.
- Before leaving the craft room make a habit of putting tools back in drawers, wiping down surfaces, and removing trash.
7. Make Use of Under-Table & Hidden Storage
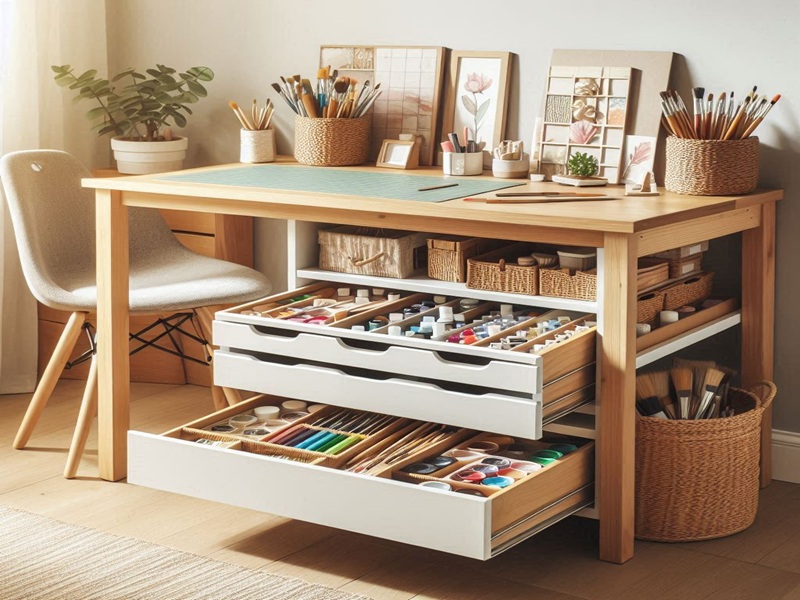
Managing a small craft room is a tedious task since it becomes cluttered quickly because of tools, materials and unfinished projects. If you want to maximize the storage space without sacrificing storage while keeping everything organized and accessible then choose the under-table & hidden storage solution.
Here are the best under-table & hidden storage solution for small craft room:
- Attach a rolling drawer unit that has multiple compartments under a craft table.
- Choose a storage bench or ottoman with a hinged lid to store extra fabrics, craft materials, or large items inside.
- Attach a stackable storage bin under the desk to keep the larger materials like fabrics, wood pieces, or yarn.
8. Use Easily Movable Rolling Cart
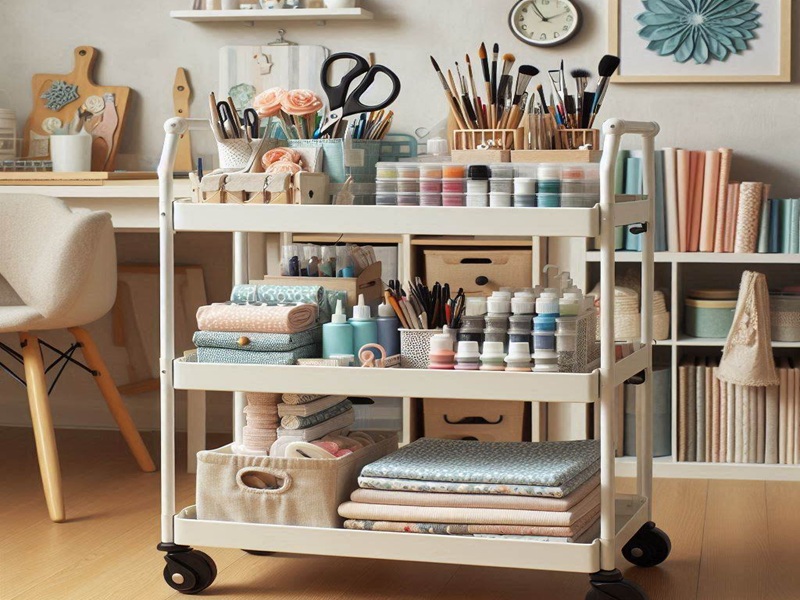
Opt for a rolling cart with drawers to store your accessories and crafting equipment. Rolling cart is a practical and vertical storage-saving solution for organizing a small craft room. Due to its flexibility, mobility and accessibility feature, you will be able to neatly arrange your crafting supplies (paints, brushes, glue guns, scissors) and move it to different crafting zones based on your need.
Here are some ideas that help you organize crafting items in a rolling cart:
- Keep the frequently used items (scissors, glue, brushes, markers) in the Top Shelf of the cart.
- Keep the secondary supplies (fabrics, yarn, decorative paper) in the Middle Shelf.
- Keep the bulkier items (paint bottles, cutting machines, storage bins) in the Bottom Shelf.
- Attach a foldable tray on top of the cart to create a mini crafting area.
- Store buttons, beads, sewing needles, and thread spools in divided trays.
Conclusion:
Transforming your small room into a functional, creative and inspiring craft room is all about smart organization of materials, maximizing storage without sacrificing the storage and creative design. By utilizing these small craft room design ideas, you will succeed in creating an enjoyable and relaxing crafting space that boosts your creativity and makes your creative sessions more efficient.
Frequently Asked Questions (FAQs):
-
How to Make a Craft Room in Small Space?
Start by using vertical storage, multi-functional furniture, and clear storage containers. Creating defined craft zones and maximizing closet space will also help keep everything organized.
-
How to Store a lot of Craft Supplies?
Use baskets to store small craft materials like buttons, beads, and ribbons. Use stackable storage bin under the desk to keep the larger materials like fabrics, wood pieces, or yarn. Use a movable rolling cart to store frequently used supplies as well as bulkier items. Install wall-mounted shelves for paper rolls, markers, or small containers.
-
Can I turn a closet into a craft room?
Yes, you can use a closet into a craft room by installing shelves, hanging racks, and using space-saving organizers. It’s a great way to maximize storage in a small space.

Hello there, my name is Anil Pun Magar and I am founder of this blog (MinimalAura). I have 5 years of working experience in home decoration field. As the founder of MinimalAura, I am sharing insights on modern minimalist living, home organization, and aesthetic interior design. My aim is to inspire a lifestyle that blends functionality with beauty.